Archive | February, 2012

Revit Visibility Hierarchy – The Revit Clinic

11 Feb

Another example to this:

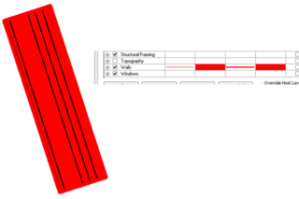
There is a Visibility/Graphic Override for the wall category in the view

The wall has an override by element

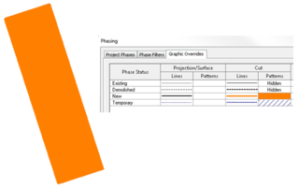
The view uses a phase graphic override

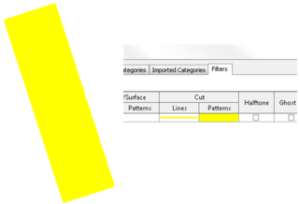
There is a view filter applied overriding the graphics of walls over a specific thickness

When all 4 of these overrides are in place, by default the Override Graphics in View > By Element is visible since it is highest up the chain at #4:

BlogA

Remove that override and I now see my view filter:

BlogB

Remove the view filter and I see the phasing graphic override:

BlogC

And lastly, change the phase filter of the view and I will see my Visibility/Graphic Override:

BlogD

via Revit Visibility Hierarchy – The Revit Clinic.

Worksets and DropBox – how to do it without getting yourself in deep doodoo

10 Feb

Worksets and DropBox – how to do it without getting yourself in deep doodoo.

  1. Locate the Central File
    1. The important key setup was creating a permanent Drive Letter mapping to the DrobBox folder were the Central file is kept.
    2. First create a folder in Dropbox for the project and get your DropBox sharing set up.
    3. Then map that folder to a drive letter. We used http://www.ntwind.com/software/utili…ual-subst.html.
    4. Everyone that accesses the Central file needs to do this and all use the same drive letter, ie everybody maps the same folder to say letter “S” or whatever nobody is using otherwise.
    5. When you create your Central file or any later Save As, you must navigate via the drive letter, not any other way or it will screw it up.
  2. Create your local
    1. Again, navigate via the drive letter and create your Local somewhere else not in the Dropbox folder. (no reason other than it keeps the Dropbox traffic down)
    2. Confirm in the Revit Synchronize dialog box that the Central File Location is via the drive letter, not anything else.
  3. DropBox syncing
    1. We found DropBox incredibly fast in updating the main Central file whenever we SWC for the size of the file and considering it’s up and downloading, at the same time. I think it’s doing a sector sync.
    2. The Central backup folder is also synced and that’s where the problems are going to occur.
    3. DrobBox has a system tray notifications, but we ended up turning it off as they got annoying.
  4. Workflow rules – here’s the key to getting this work without corrupting the Central file:
    1. No editing the same element, ever – this is a guaranteed corruption. Revit will allow this but you won’t find out until you SWC. The eperms.dat file controls this but in the milliseconds between DropBox syncing this file, you could be both accessing it for various reasons and updating it. DropBox will recognize that this has happened and creates a second eperms file which Revit won’t see. This means that Revit isn’t really tracking permissions correctly anymore. We both continued to work with the corrupted eperms w/o issues.
    2. If you do accidentally edit the same element and know it happened, stop your work and figure out the best approach to recover. We had it happen once by accident so it is a definite risk. Our recover was easy as we were off the model and mainly doing 2D work.
    3. You have to coordinate your SWC, so that you are NOT saving at the same time. You need to also confirm that DropBox has finished syncing.
      1. Dropbox adds a little icon to the file icon to indicate it’s state.
      2. If you have Carbonite running, it prevents those little icons from showing, so turn off Carbonite backup on the DropBox folder.
    4. I deleted the “Synchronize Now” button off the quick access ribbon as it is right next to the save button. Too risky miss and hit sync by accident.

Autodesk Exchange Apps

2 Feb

Wall Opening AreaAutodesk 12/5/2011

In the process of cost estimation, the area of walls is used to contract external firms. For many companies in many countries, such as Brazil and Germany, the wall area used on this contract do not consider openings smaller than 2 square meters approximate 21.5 square feet, mainly because the extra work required to build the opening is paid by the extra money that came from the material/work not used.

This plug-in calculates the sum of opening areas on each wall and stores the values as two shared parameters on walls. You can specify the maximum area of opening to search on walls.

The command will search on each wall for openings, check ones that are smaller than the specified value, sum all these areas and store the information as the following two Shared Parameters binded to the walls:

Opening Area Smaller Max – Sum all area values smaller than a specific value e.g. 2 square meters;

Opening Area – Sum all opening areas including the above.

When the command is run for the first time, the plugin will create a shared parameter file named “WallOpeningsSharedParam.txt” in the same folder as the plugins .dll module, which is typically %AppData%\Autodesk\Revit\Addins\2013\ADNPlugin-WallOpeningArea.bundle\Contents. This plug-in was written by Augusto Goncalves. It became a Plugin of the Month on Autodesk Labs: http://labs.autodesk.com/utilities/ADN_plugins/. ADN Plugins of the Month are provided with full source code that has been installed with this plug-in. While the code is not needed to make use of the plug-in, it will be useful should you want to understand how the plug-in works or to extend its functionality to meet your specific needs.

via Autodesk Exchange Apps.

Revit in Remodels

1 Feb

So what do you do with partial demos? You could create a new phase between Existing and New Construction called “Existing To Remain.” Then copy the element to be demo’d to the clipboard… then demo the whole element in the “Existing to Remain” phase… paste the element (into the same place) back into the “Existing to Remain” phase and then reshape the existing to remain version of our element (Some users think that a demo phase is not necessary, but it has it’s benefits). Now anytime the design goes through iterations all you have to do is reshape the existing to remain element while leaving the as-built model preserved and intact.

Revit Beginners.